| Vintage Gibson B25 Neck Reset Click on images below for larger version |
What started off as a typical Gibson Headstock break turned into oh-so-much more! This guitar was damaged by a fall which broke the headstock. The original repair to the headstock was OK, but there was hidden damage in the neck dovetail that was improperly repaired. The result was that the neck was loose in it's pocket, the intonation was off and the guitar was un-playable.
My friend Pat offered to let me work on this guitar during my Level 2 Guitar Building and repair course, his feeling was there was nothing to lose by trying to fix it as he couldn't play it the way it was. I really appreciated that I wasn't in danger of ruining a highly collectible instrument on my path to enlightnment so I agreed to give it a try. The instructor, Mike McConville, thought it would be an excellent teaching opportunity and the idea was to illustrate a pretty common repair to reset the neck angle on an older guitar. We had a real eye opener when we finally steamed the dovetail joint loose, it had been broken and the technician had injected epoxy into the joint in an effort to fix it without taking it totally apart.
The images below document the high (and low) points of this repair.
(Click on the images for a larger version and alternative navigation through this page)
 Here is the original injury. A pretty reasonable repair. |
 It's difficult to see in this picture, but the neck is pulling away from the body. |
 Here we've removed the 16th fret and are preparing to steam the joint free. |
|
||
 With all of the masking done, and the clamping system in place my instructor demonstrates to the class how to steam the joint apart |
 A bit horiffic to watch, but with some coaxing the dovetail finally succombed and the neck and body parted ways |
 Another angle, and you can see how the lacquer "blushed" from the steam treatment |
|
||
 Not to worry, it polishes right back up. |
 Here's the reason for the tuning problems, and also why the dovetail was so much work to remove |
 The dovetail was broken and there was significant evidence of epoxy being used to hold it together! |
|
||
 After thinking about the next step we decided that the best way to rebuild the dovetail was with the fretboard separated from the neck |
 We use a heat lamp, spacers and metal knives to separate the fretboard |
 Easy does it, and the fretboard comes off cleanly |
|
||
 Nice clean separation |
 Only the original glue was disturbed. No wood tearing at all. |
 Now the major surgery on the dovetail can begin |
 Remove all of the damaged pieces |
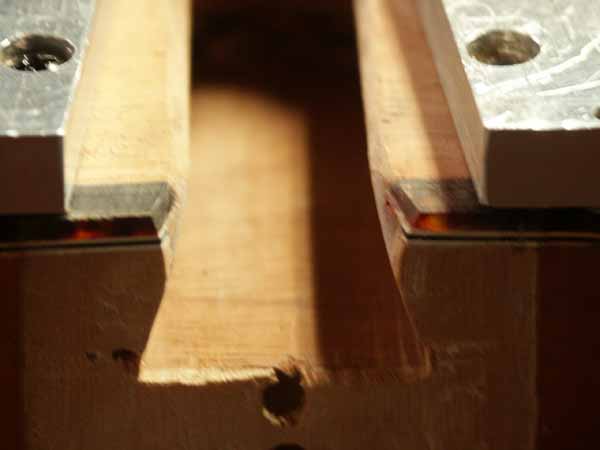
 And we're left with a straight tennon to attach the new dovetail |
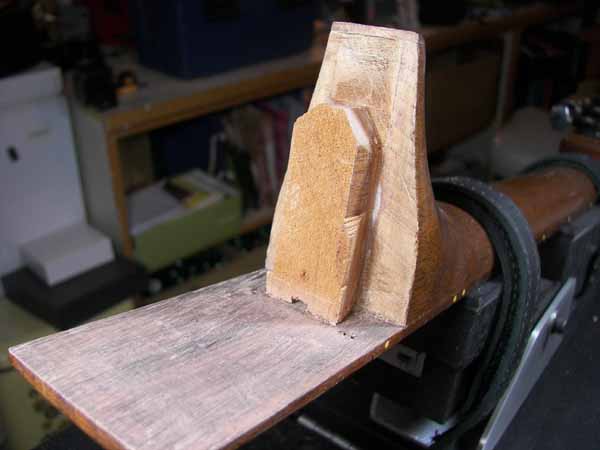
 Fresh mahogany is glued into place then machined into a new dovetail |
 Now a jig is mounted to the neck block and a new dovetail pocket is machined to match the one on the neck |
 The fit looks pretty good, though the neck angle has suffered a bit |
 First of many test fits before final glue up. |
|
||
 As you can see the neck angle required some adjustment. |
 Even with the fret board in place it is still a bit off |
 Using a dremel tool to undercut the joint at the end of the neck, I carefully fitted it to the body |
|
||
 Here's a shot of the Guitar Repair class, everyone was pretty focused on their work |
 I spent most of the 3 hour class making the neck fit just right, under the guidance of Mike, my instructor. |
 With the neck angle almost perfect it was time to make the fret board flat again. |
|
||
 I created a template of the neck radius in order to preserve the radius as I sanded the fretboard. |
 Part of the original repair saw great gobs of epoxy embedding the truss rod nut. Adjustment at this time is impossible. |
 I used dental picks to remove the epoxy from around the truss rod, while not disturbing the original repair. |
|
||
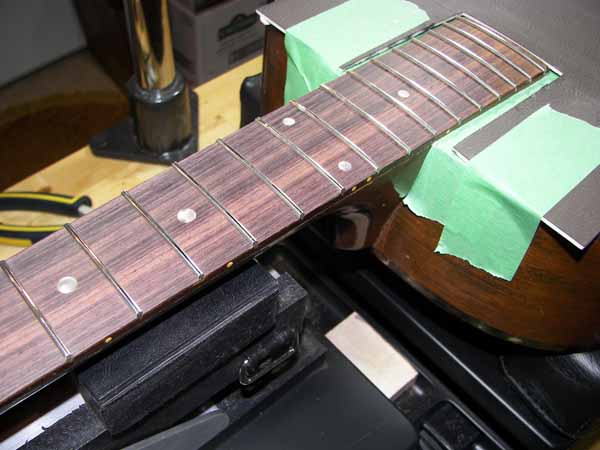
 With the exception of a slight drop off at the last fret, the neck is perfect. I decided to stop as these frets are pretty much unreachable on this Gibson |
 The rest of the neck is flat with the original radius preserved |
 I managed to remove most of the finger divits from the fret board, and am now starting to install frets. |
|
||
 An auto body dolly provides backup while the frets on the fretboard extension are installed |
|
 Now to even the ends, level, dress and polish Now to even the ends, level, dress and polish |
|
||
 Frets are all dressed, and the fretboard is ready for a bit of lemon oil. Frets are all dressed, and the fretboard is ready for a bit of lemon oil. |
 New nut is installed and we're all strung up. New nut is installed and we're all strung up. |
 I spent some time making a new saddle which needed minor compensation built in I spent some time making a new saddle which needed minor compensation built in |
|
||
 Here's the fit of the neck after all of the adjustments Here's the fit of the neck after all of the adjustments |
 Nice "Glam" shot before packing her back up for delivery. Nice "Glam" shot before packing her back up for delivery. |
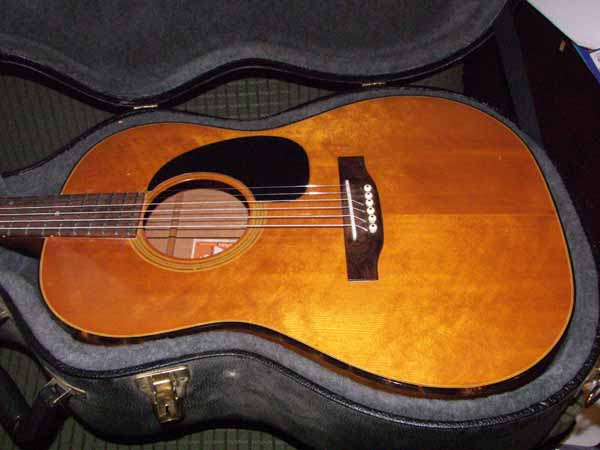 One last peek, then it's off to Pat's house One last peek, then it's off to Pat's house |
|
||
From Pat; The 'Guitar Face' is due to me thinking..... "I used to be able to play 'Mood for a Day' much better...." Hmmmm... Perhaps due to the 20 year lag in practice? Well, I'd better be doin' some catchin' up!! Glad I have my 'Gibson' back to practice with again! {And it tunes properly, too!!} A big thanks to the very patient "guitar doctor". : ) |
||
|
||

